Sign in to unlock all code snippets and resources
100% tested and verified code snippets
New here? Register for free to get started
© Copyright – 2026 – All Rights Reserved. Created by SuperWP
In this blog post, we’ll delve into the intricacies of customizing WordPress dashboard widgets using a provided code snippet. While the code itself won’t be included in this post, you can refer to a corresponding YouTube tutorial for a step-by-step guide.
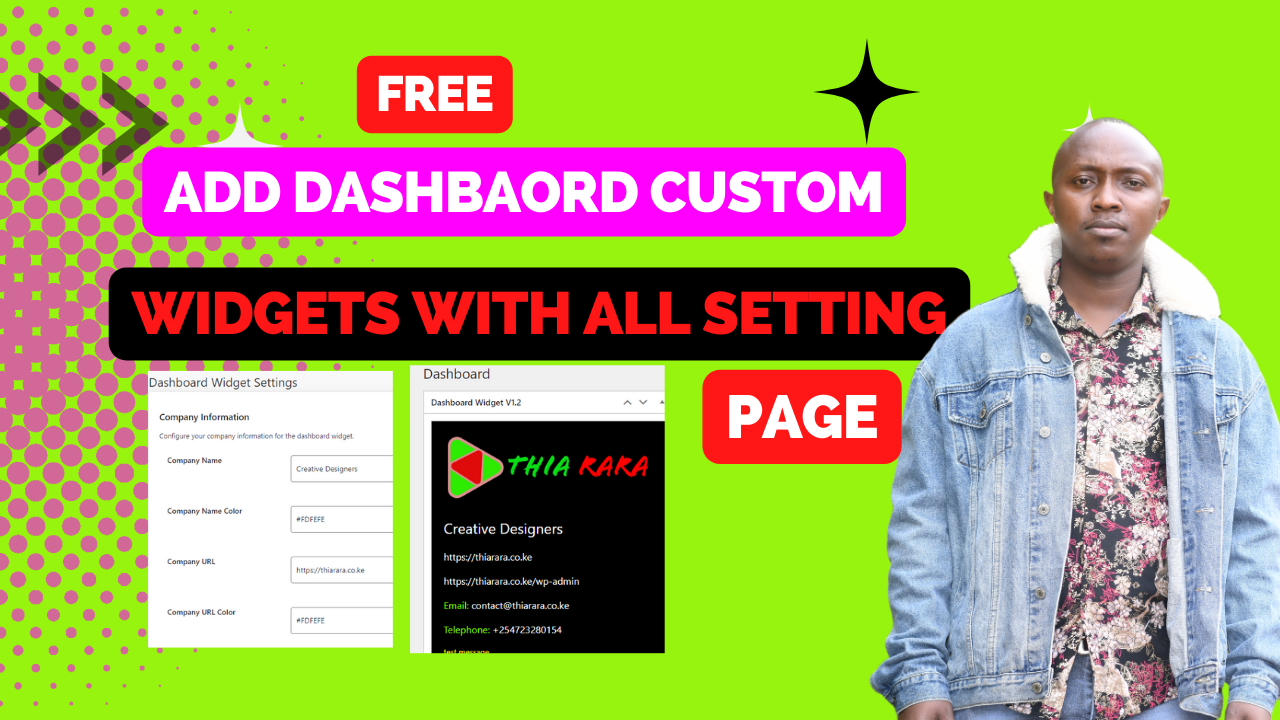
Before we embark on the customization journey, it’s essential to understand the purpose and structure of the given code. The code aims to add an admin menu for configuring company information settings on the WordPress dashboard.
Before we embark on the customization journey, it’s essential to understand the purpose and structure of the given code. The code aims to add an admin menu for configuring company information settings on the WordPress dashboard.
The initial part of the code focuses on adding a menu page to the WordPress admin dashboard. This page, titled “Dashboard Widget Settings,” provides a user-friendly interface for managing various company details.
Within the form, the code implements a clean and organized styling, ensuring a pleasant user experience. The form includes input fields for company details, such as name, URL, email, phone, and more.
The code incorporates custom styling options, allowing you to define colors for different elements. From the company name to background colors, the customization possibilities are extensive.
Notably, the code integrates the WordPress editor for adding a custom message. This feature enhances flexibility, enabling you to include personalized messages in the dashboard widget.
Moving on, the code includes a function for rendering the custom dashboard widget. This widget displays the configured company information prominently on the dashboard.
The rendered widget features a company logo, styled text, and clickable links. The visual aspects are highly customizable, offering options for adjusting colors, alignment, and more.
To add a touch of personalization, the code includes a function to define a custom icon for the dashboard menu item. This visual element adds flair to the overall user interface.
In conclusion, the provided code snippet empowers WordPress users to create a tailored dashboard widget for managing company information. Its modular structure and extensive customization options make it a versatile tool for personal and business use.

Stay UpTo Date with Latest Post And news: