Sign in to unlock all code snippets and resources
100% tested and verified code snippets
New here? Register for free to get started
© Copyright – 2026 – All Rights Reserved. Created by SuperWP
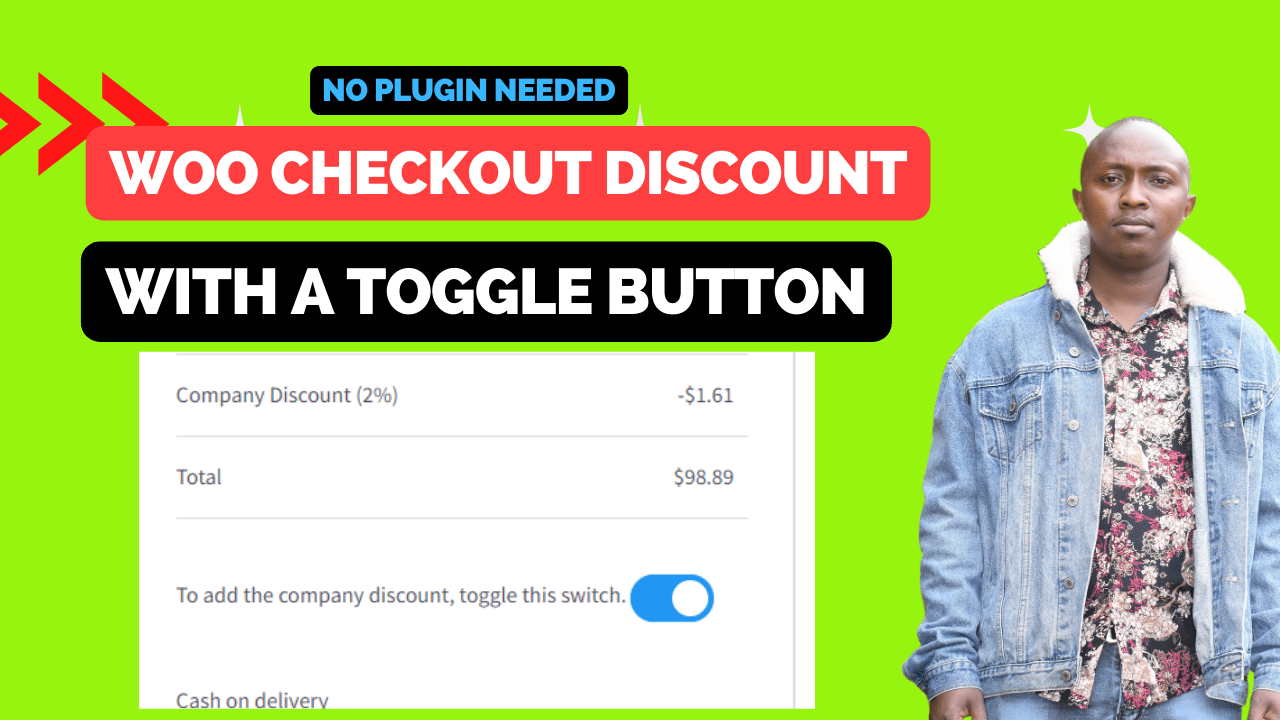
Are you looking for a way to offer a company discount to your customers on the WooCommerce checkout page? In this blog post, we’ll show you how to add a custom toggle switch that allows customers to apply a discount to their order. We’ll walk you through the code and explain how it works, so you can easily implement this feature on your own WooCommerce site. Whether you’re a developer or a store owner, this guide will help you enhance the checkout experience for your customers.
Are you looking for a way to offer a company discount to your customers on the WooCommerce checkout page? In this blog post, we’ll show you how to add a custom toggle switch that allows customers to apply a discount to their order. We’ll walk you through the process and explain how it works, so you can easily implement this feature on your own WooCommerce site. Whether you’re a developer or a store owner, this guide will help you enhance the checkout experience for your customers.
The first step in adding a company discount toggle switch to the WooCommerce checkout page is to display the switch itself. This can be done using an action hook and some HTML and CSS code. You can customize the appearance of the toggle switch using CSS to match the design of your site.
Once the toggle switch is displayed on the checkout page, you’ll need to send data to the server when the switch is changed. This can be done using jQuery and Ajax. When the toggle switch is changed, an Ajax request is sent to the server with the value of the toggle switch.
The next step is to set a session variable based on the value of the toggle switch. This can be done using an Ajax receiver function. The function receives the Ajax request and sets a session variable based on the value of the toggle switch.
The final step is to apply a discount to the cart subtotal if the session variable is set to true. This can be done using an action hook. The discount is calculated as a percentage of the cart subtotal and applied to the cart.
By following these steps, you can add a company discount toggle switch to your WooCommerce checkout page. This allows customers to apply a discount to their order and enhances their checkout experience. You can customize the appearance of the toggle switch using CSS and adjust the discount percentage as needed.
This blog post shows you how to add a company discount toggle switch to the WooCommerce checkout page. The process involves displaying the toggle switch on the checkout page using an action hook and HTML and CSS code, sending data to the server with jQuery and Ajax when the switch is changed, setting a session variable with Ajax based on the value of the toggle switch, and applying a discount to the cart subtotal if the session variable is set to true. By following these steps, you can enhance the checkout experience for your customers.

Stay UpTo Date with Latest Post And news: